Good morning, well... here it is my step by step tutorial on how I colour my grass... I have also placed it on our Color Me Copic blog too... Hope it inspires....

First I stamp my image then cut out the desired shape, it's so much easier for me to re stamp then recolour an image if I didn't cut it properly, also it's easy to realign the die on the image to ink the border edge.


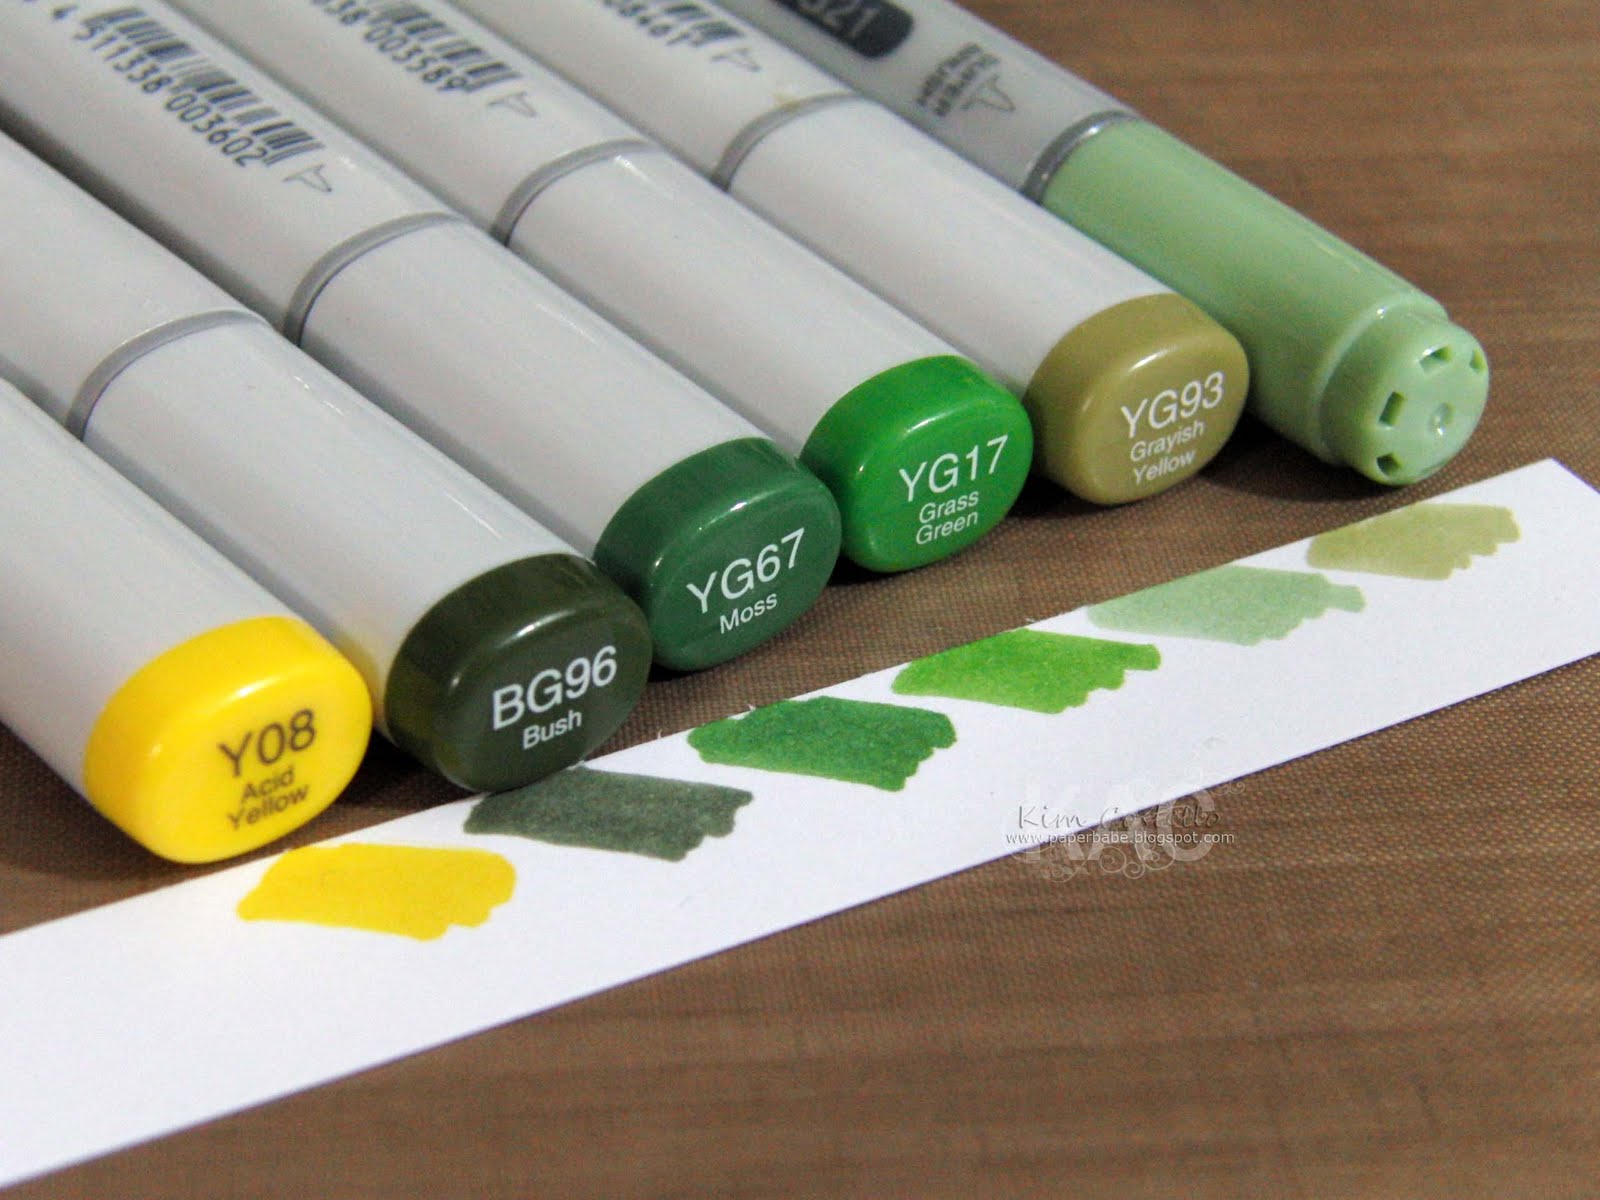
Here are the varying greens I've chosen but by no means do you have to use these... any greens will work, I have a light, medium, darker and the darkest for shadows. The yellow will be the flowers but again any colour which suits your project will work!

I start by colouring my grass area, you can have this any size, maybe a mound, or small grassy verge... I have used YG93 and just coloured... you really don't need to be neat with this bit as it's going to be covered with LOTS of grass!!!

Next colour... I've used YG17, now just flick... starting at the bottom of your blade of grass flick the pen up, it will naturally tapper for you and try not to go straight up either a few stray directions make a more realistic grassy look!

I have covered the whole base colour with YG17 blades of grass, notice I have flicked a few strand directly over her shoes and trouser hem! This gives a more earthed impression of her standing in the grass instead of on top! You won't want any on the tops of her trousers though (unless the grass is super long and tall).

Right my next colour, YG67 is a darker tone of green and this will give depth to the finished look... simply follow the previous grass flicking instruction with this colour, you will not need to cover as much area so you won't cover over the lighter blades. To really ground her I have taken my darkest tone BG96 and dotted around the base of her shoes and continued out a little to create a shadow!


Don't forget the top of the flowers too, you won't need to hold the tip there this time as there is no colour to move. In fact a very gentle dab will produce a lovely tiny dot.

Ooh finished, just check now if I think there's enough shadow and contrast maybe add a little more to the shadow under her feet. You might have noticed I didn't need to use one of the colours I originally chose. This is also where I will replace the nestability die and blend a little distress ink to the edges.
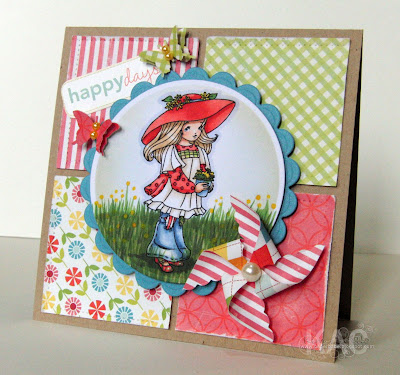
Here is the image placed on the card front!!!
Supplies: Patterned Paper: Echo Park - Sweet Summertime Collection Kit;
Dies: Spellbinders nestabilties: circles; MS: butterfly punch;
Other: Flat Backed Pearls - 3mm - Golden Yellow; Flat Backed Pearls - 8mm - white; brad; scallop scissors; stitch tracer; 3D foam;
Thank you so much for visiting today, stop back tomorrow for a Basic Grey Challenge and Club Anya & Friends Sketch Saturday.
BiG HuGs Kim :)

12 comments:
Awesome tutorial Kim, thanks so much! Gorgeous card too hun!
Hi Kim, i think you do an awesome job, big fan :) Do you think you could do a tutorial on how you do your awesome hair with the highlights and all with the copics? I would love to see it in action. Thanks for the great inspiration.
gorgeous card! thanks for the tutorial!
wow wonderful card and tute...still dont think my attempt will look anything like yours...but shall have a go!
Kim thanks for the amazing tutorial! You ROCK and your scene looks perfect!!! Absolutely gorgeous!
Hugs~ Kim
Hi Kim! What a great grass tutorial! I loved it when you made a card with Audrey a while back. Must try this! And thanks for visiting my blog and sharing the Emo info! Now I know all about the Emo world! HuGs!
What a fabulous tutorial!! and a gorgeous card!
Just a quick note to let you know that a link to this post will be placed on CraftCrave today [09 Jul 01:25pm GMT]. Thanks, Maria
Amazing Copic work! Love that you were able to create a grass and flower field out of nothing! :)
I LOVE your coloring! And thanks so much for the tutorial! =)
Je vous remercie beaucoup pour ce tutorial. Je vais maintenant pouvoir ajouter de la pelouse sur mes coloriages.
Merci encore et passez une très belle journée ;o)
I'm going to give this a try,you make it sound so easy,thankyou for inspiring me.x
Post a Comment