Friday, December 18

Paperbabe Stamps Introducing DesignA Tweed

So it's our final day of introductions on the Paperbabe Stamps blog today...
And we are showcasing the DesignA Tweed stamp set. I have wanted to get this made into a stamp for some time now and here it is... I have so many pattern ideas I just haven't had the time to try yet.

I hope you like my samples so far...
I was so pleased with the burberry result, I've stamped the black using the medium stripe, then stamped again in pale ink between and then the thin red stripes. I coloured the remaining pattern with copic marker. I will definitely be trying this version again. I paired it with Thank you stamp.
I loved this grey check but the photo is making the red really really pop out, and it's just not that overpowering in real life. The strip at the bottom of the card has a subtle houndstooth stamped tone on tone. I finished off with the big Love & Laughter Sentiment stamp.
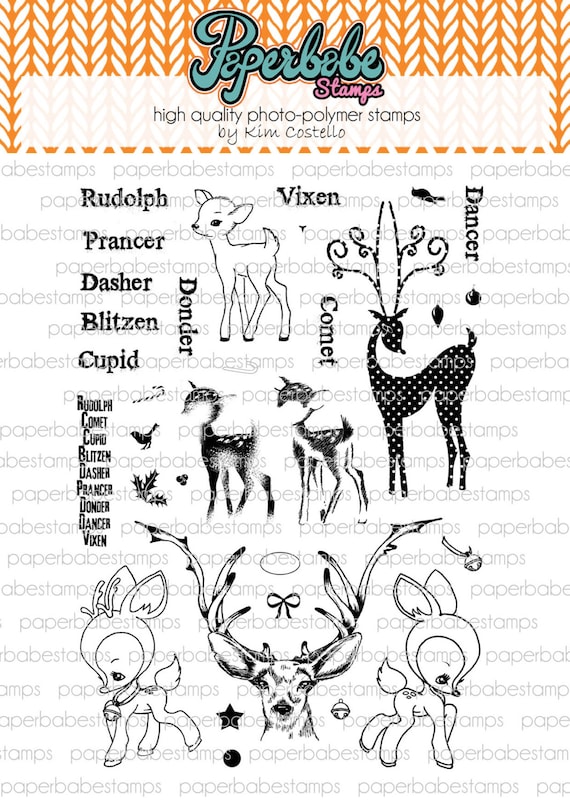
I wanted to create a feeling of tweed with this one, I think I would use a darker ink next time. The fabulous deer was heat embossed in gold on acetate then fussy cut out, I teamed it with a Christmas sentiment but I think it could work with any type.
I stamped the stocking in the herringbone stamp in red ink on cream card. The background is a very dark green and I stamped the solid lines and heat embossed in gold. I use a cosy Christmas sentiment to finish.
I really have so so many ideas of checks and plaids that I just tried a few on some mini heart tags. They've been dipped in gold tee hee, no I have heat embossed the bottom part... a little faux gold leaf but really it just looks like embossing lol!
This picture shows the shine better.

If you have time to, pop by the rest of the team to see their take on the DesignA Tweed Stamp set...


I'm sure the schools are finishing for Christmas holidays today, I hope you have a lovely Christmas and we will be back in the new year for our next challenge.

Enjoy a wonderfully creative holiday!
HuGs Kim x

Thursday, December 17

Paperbabe Stamps Mixed Media Stencils & Winter Fairy Wing Template

We are introducing a new stencil and mixed media template on the Paperbabe Stamps blog today Yay...

Here' my sample...

Ok so I went to town on this one lol, it certainly isn't how I envisioned it turning out, but that is so what the quote is trying to say!!! An Arty adventure indeed, she's grungy and angelic so I'm thinking of her a an urban angel.
I got myself some of those spray Goosebumps and sprayed a generous layer over my watercolour paper before I began. I think I was a little too generous and it looks a little like speckled stone or concrete. It was easy enough to draw over using the templates and stamps, I used a red and orange fine point graphik(current pen addiction) pen for her hair, no penciling first and it worked just fine. I used the same pens to add hair lines throughout.
I used the brown pen in the set with a waterbrush to colour in her skin before stamping her face.
In the background I used a masking fluid pen through the herringbone stencil. Then used the same graphik pens to add splashes and washes and speckles and general explosion of messy colour all over the place. I used one of my all time favourites techniques of heat embossing some flowers in white powder onto tissue, still impressive!!! 
And then the wings... drew around them in a blue ink, secured them in place with a little washi before spritzing some grey ink. I added a little more detail to the lacy edge with pen and painted the whole wing with wink of Stella glitter. I then removed the masking fluid and added some interest to the background with the Art Risks stamp, inking just some of the quote and dotting it randomly.


I'll be back again tomorrow!
Enjoy a wonderfully creative day!
only eight more sleeps eeek I'm a big kid!!!
HuGs Kim x

Wednesday, December 16

Paperbabe Stamps December's New release Introductions!!!

We are introducing a new old stamp set and mixed media templates on the Paperbabe Stamps blog today Yay...

Here's a couple of my projects...

Ok so this is pretty dramatic but I had lots of fun, I was probably inspired by a wonderfully talented artist Caia Koopman, she uses very bold colours and I thought I would give it a try, isn't that what art is all about?
Mmmm I heat embossed my art quote, just love that finishing touch. 
Wanted to mention my page is just A4, and there's plenty of background, so you have an idea of the scale.
Now, if I had another day I could well see lots of extra additions to my piece, I am loving the polks dots on red with that background lol!
So, I didn't quite create a video this time so much to do for all the festivities round here my time is pretty coveted... But I did manage a slideshow Yay showing a few steps when I remembered to take a picture or two. I just love how a piece of work emerges from a blank canvas.


Next is a wood block piece of art, I think 20 cm square using the mini profile templates alongside the mini portrait templates and face stamps, I just love that these can all work together... not that that was my plan or anything lol!
She was inspired by the Goddess Minerva, wise and crafty and I've painted her here with blue hair and her trusty sidekick Owly.
I even managed to paint a little hand for Owly to perch upon, 
I've used flick & fringe hairstyle, with the thinner Head from Head & Torso, the body from Profile Head & Torso, gosh got all that? Her face was stamped using the Mini Doll Face, still an old favourite.


Now if you get a moment do visit the rest of the talented Design team...

Kim(you're here already)
Chris
Delphine


 Thank you very much for stopping by, I will have more to introduce tomorrow if you would like to return then!!!

Enjoy a wonderfully creative day!
only nine more sleeps eeek so excited!!!
HuGs Kim x

Friday, December 11

Paperbabe Stamps Challenge #23 ~ Sprinkle of Glitter

It's a theme challenge over on the Paperbabe Stamps challenge today...
A sprinkle of Glitter yum!

Definitely the season for glitter? 
Like you need a time of year for sparkly stuff lol!

So during the Holiday Style class the talented May Sukyong Park showed us how to create this wonderful card idea of filling a shape with small stamped images...
Well, I started off by die cutting a tree shape from acetate, two in fact so I could work on two card fronts simultaneously. 
I used quite a few Paperbabe Stamp sets in my Christmas tree design... most of the images were from Reindeer fusionsSparkle BrightBottle Brush TreesArctic Jumper and Female Face Mini just for those dinky cute heart images.
You can see that this card is pretty identical, but with a different glitter edging(loving this DCWV glitzy paper) it looks quite different (it's tricky photographing glittery shimmer). You might just see that I punched a few dots of the glitter paper for some of the baubles, just for ease and so my card wouldn't buckle under the heat gun!
But, then I thought I would try making the tree stand out a bit more by die cutting four trees in cardstock and laminating, to then line up behind the stamped area and dry embossing through my die cut machine, FUN!


Thanks for stopping by
We will be introducing December's New stamps next week Yay, so I hope you have time to pop back then!
Enjoy a wonderfully creative and festive shopping weekend!
Hugs Kim x


Friday, November 27

Paperbabe Stamps Challenge #22 ~ Picture Inspiration

It's a Picture inspiration over on the Paperbabe Stamps challenge today...

what a fabulous day to share my mixed media piece, this is one was created during Week 43, on 'Life Book 2015'
Any Day is a Good Day to Celebrate with the lovely Patti Ballard

I was definitely inspired by the feeling of afternoon tea, the picture although was simply missing some cake...

I really wanted to try out the female face stamps on a slightly angled face. 
I started by using the Head from the Head & Torso template, instead of following a central line I moved it slightly to the left of the face, so the eye would rest against the edge. I could have used my hair templates but I just went with the creative moment. The cake was my own design which I wouldn't mind a slice of, thank you.

I've used the mini female face for her lips and nose. Then I used the larger female face stamps for her eyes and brows to show how well these two sizes can work together.

I feel this piece isn't quite finished, I want to add a little more sentiments and doodling, or even a few hints of summery yellow... if I do get there I will be sure to share it.

Thanks for stopping by
Enjoy a wonderfully creative weekend!
Hugs Kim x


Thursday, November 19

Paperbabe Stamps Mixed Media Templates Day Two!

Hello I'm back again as we are introducing another new stamp set and mixed media templates on the Paperbabe Stamps blog today Yay... Although it's the same as yesterday's just a larger scale for all those canvases and mixed media goodness!

Onto a couple of samples...


This is a mixed media piece using the Head & Torso Template and the New female Face stamp set. Although I added my own free style hair, owl and flower.

The face I painted first with ceramcoat acrylics before stamping the features. I've opted for the smaller open eyes and full nose.

I wanted to demonstrate how you can manipulate the lip stamps to make a much fuller bottom lip by squeezing the edges of the stamp on your acrylic block.


This next sample really was an experiment I just had to try, I can't wait to have a go with the mini templates and stamps...
This was created completely from frosted shrink plastic, I ended up cutting into three sheets but there's plenty left over for smaller projects, but I just had to give it a go... lol!
I got out my twinkling H2os and painted the shrink plastic, it's great that the plastic doesn't warp when wet but it does take a little while to dry.
I also learnt it is much easier to draw the parts and then cut out before painting. When the face was dry I stamped her face using the New female Face set and Mermaid Mixed Media Template in memento luxe pigment inks. I've utilised the stamps from Oriental zen for the added scale pattern, the dots and the flower in her hair as well as the little fish.
The shrinking was magical as always, not knowing how it would truly look. The mica or shimmer in the paint get's like flakes when shrunk giving the impression of scaley skin I probably would otherwise struggle to achieve. I forgot to do a few things before gluing but it was my first attempt. 


And another little Video this time I'm using the templates...


AND how wonderful were the team's projects yesterday, what a treat I hope you will pop by their blogs for even further inspiration and check out their gorgeous projects...

Thank you very much for all your support and I hope you will return tomorrow as the stamp will be in the shop ready to buy!!!


Enjoy a wonderfully creative day!
HuGs Kim & the Team x

Wednesday, November 18

Paperbabe Stamps November's New release Introductions!!!

We are introducing a new stamp set and mixed media templates on the Paperbabe Stamps blog today Yay...

I'm sharing a couple of my projects...
I had planned on attaching this cut out piece to a yummy mixed media background but really... I just loved it as it is, it could be a great shaped card or a special art piece for the mantle.
I followed my steps in the video, but had her looking in a different direction, she has been drawn on watercolour card, her head slightly tilted, her green eyes have heart pupils and I opted for the open mouth stamp. 
I very simply painted her with those scrummy Neocolor II water crayons. Then fussy cut and will probably add an easel die cut to her back to help her stand.

Next
This next image may already be familiar to you, it was one of our Life Book lessons, the theme we were given was princess warrior and I wanted to show how well the female face stamps work with my other mixed media templates.
 I've used the wavy central parting with the head & torso. The rosespeony were stamped and masked and I hand drew the rest of her floral head mess lol.
Here's the before and after warrior paint lol!
It has been painted with watercolours and the background has been created using stencils and hand painting the vine.
I made a crest by hand drawing around my stamped quote and watercolouring.

I even managed a little video, I'm still working on my filming skills but at least I managed to talk in this one lol!!!


AND for even further inspiration, pop by the rest of the Team blogs and check out their gorgeous projects...


Enjoy a wonderfully creative day!
HuGs Kim x

Saturday, November 14

Holiday Style Class: Day 5

Hi there thanks for stopping by...

This is just a quick post to show you what I'm creating for the student gallery at the "Holiday Style" card class that I'm taking.
We have reached day 5, although it's just the third day of classes, my cards are based on Julie's tutorial where she created a playful deer holiday card.
I masked the snowdrift but as I didn't have one of those fab molotow masking pens I used a piece of frisket film, I have cut into a sloping hillside. I keep the mask piece stored on the back of my stamp set for future use. My background was created with some scrummy gelato's so easy to apply then wash through to blend. It didn't warp my paper too much considering I didn't use watercolour paper, tut tut!
I have to say how much I loved the black-and-white images on a colorful background, it is super eye-catching AND It saves so much time colouring those cute little deers. The sentiment from Sparkle Bright stamp set was heat embossed in white and I fussy cut with a border.


Pop back Tuesday for sneak peeks of November's New release!
Thanks so much for stopping by enjoy a wonderfully creative weekend!
HuGs Kim x


All Craft Sites

Since 21.08 You're Number...

Top 40 Arts and Crafts Websites