Friday, June 12

Flourish Notebook ~ Tissue Stamping Collage

Hello everyone!!!
Hope you're keeping well and safe...
We have a new challenge up on the Paperbabe Stamps blog today,
I created this little notebook based off of the sketch,
I used a palette knife and acrylic paint directly onto watercolour paper to get the random colours and texture.
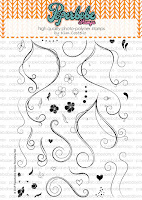
 all the flourishes, flowers and imagery were tissue stamped and collaged onto a painterly background. I think I would paint the back of a few to get some definition to a few of the flowers, another time maybe.
When it was dry, I then die cut the whole image using an Eileen Hull notebook die
I love how the image wraps around to the back
I gold embossed the flourish mdf word to compliment the stroke of gold paint on the bottom edge.


Supplies used...

Thank you so much for stopping by
enjoy a wonderfully creative weekend
HuGs Kim x

Friday, May 29

Paperbabe Stamps Challenge ~ My Quote Right Now!

Hello everyone!!!
Hope you're keeping well and safe...
We have a new challenge up on the Paperbabe Stamps blog today,

 I've created a one layer card/postcard using the flourishing hair stamp set along with the female face, the head and torso templates. 
I stamped the quote using the Fun Alphabet stamp set, this quote right now is to remind me that it's all going to be ok. I'm where I'm meant to be right now, whether that's with my home life, work life and the rest hahaha!
I think it keeps you in the 'moment'. 
She has been coloured using copics, I used distress oxides for the background to give a smokey photo effect.

supply links...

Thank you so much for stopping by
enjoy a wonderfully creative weekend
HuGs Kim x

Wednesday, May 27

Video time lapse ~ Polka Dot Hair

Hello and welcome,
I hope you're well and keeping safe... 
Popping by to share my time lapse video with you...
I thought it would be fun to video the process, there are more details over on the original blog post.

You can click on the picture above or


supply links

Thank you for visiting, Stay safe enjoy a wonderfully creative weekend,
HuGs Kim ♥

Friday, May 22

Dotty about Hair

Hello everyone!!!
Hope you're keeping well and safe...
just to mention there is still plenty of time to take part in our current

I thought I would create a very rainbow coloured card, inspired by the rainbow of flowers, adding lots of dots with the polka stencil
I've combined two hairstyles to create this one, the fringe from the rag tails with the volumptuous waves from this template set, framing the 3/4 view face.
I thought the clasped hand would be perfect to hold the cutie bear balloon, created using this old Adorimals stamp set.
 I love the contrast of real skin to the cartoon hair, so fun :) I've used distress oxides for the background, love that the templates help to mask her.
copic colours, because I forgot the photo..
R000, 00, 02, RV91
YR000, E70, BV20, 25, V12


click pics for links

Thank you for visiting, Stay safe enjoy a wonderfully creative weekend,
HuGs Kim ♥

Friday, April 24

Paperbabe stamps Challenges #117 ~ Sketch ~ Tiny Book

Good morning I'm here to share my project for our current challenge over on the Paperbabe Stamps blog...


 I created this teenie tiny accordion book, using the Eileen Hulls cute tiny book die, I've added lots of texture to the cover with some yummy cream paste through the cross hatch stencil onto some cream kraft card.
I then painted the whole cover in black paint and dry brushed some acrylics and added a hint of copper wax to give a smidgen more interest.
 The front image has a pair of hands, which I coloured in copics, holding or sharing a rainbow of love, using an old stamp set for the rainbow. I added a layer of liquid wax first time I've tried this stuff, I think it's fab. The thicker layers seem to create interesting cracks, giving it a wonderful aged look.
The inside is waiting for me... I used the longest side of an A3 and trimmed it down to the height of the book and scored to concertina the cardstock into the width of the book cover. Whats left is a little tab length that I adhered to the inside covers and painted it black to disappear into the inside cover(if that makes sense?) then I added a second to the other side.


click pictures for direct links...


Thanks for stopping by,
Stay safe and enjoy some creative quarantine time,
HuGs Kim x


All Craft Sites

Since 21.08 You're Number...

Top 40 Arts and Crafts Websites