Pages

Monday, April 25

Simon Says Stamp and Show some Buttons!

Good Morning!!! It's Monday!!! so, we have a new theme at...


Stamp and show buttons!

I decided to try a little canvas inspired card using some of Wendy's wonderful stamps on sticky back canvas. Distress inks, stains, embossing powder and Paint dabber. The flower is paint dabber on Art film blackout and the head on grungeboard. A few paper flowers in place of the stamped background  flowers and wooden buttons painted and glitterfied!


Sorry my post is delayed I will update with more information when I have time, hope you all had a beautiful Easter holidays....

Photobucket
Hope it inspires and why not pop round to the rest of the team's inspiring projects!!!
THE director ~ Linda Elbourne
Candy Colwell ~ Dan ~
 Kim Costello <~ You're already here
Thanks for stopping by, have a wonderfully creative day!
BiG HuGs Kim :)

Monday, April 18

Simon Says Stamp and Show A Tim Holtz Technique!

Good Morning!!! It's Monday!!! so, we have a new theme at...


Stamp and show a Tim Holtz Technique!


WELL! I've included a few Tim Techniques... hard not to really! This atc size note book has had the shabby chic treatment from Compendium of curiosities (pg 49) using grungeboard and Bitty grunge.


I went for a different color scheme with denim and lettuce paint dabbers!


The grunge key hole, corners have had the rusted metal technique.
I used the cinch to bind with a metal o ring, it looks a bit bent must need practice!
I stamped the back of the covers with lettuce paint dabber!


and I added a fragment which has a different technique using alcohol and archival ink like a mask, a grungepaper label and philosophy tag on a swivel clasp.


I have applied the same technique to the back of the book too and a grungeboard bird to the label!

Photobucket
 
Hope it inspires and why not pop round to the rest of the team's inspiring techniques!!!
 
THE director ~ Linda Elbourne
Candy Colwell ~ Dan ~
 Kim Costello <~ You're already here
Thanks for stopping by, have a wonderfully creative day!
BiG HuGs Kim :)

Thursday, April 14

Let's Hang ~ quixotic, CPS, FFF and Papertake

Hello, it's a busy time with the little ones on Easter holiday... but I wanted to share a card I have over at Quixotic...

I still haven't inked all the wonderful characters in the The Greeting Farm - Stamp Kit- Creeper Crew - Creepin' and picked the fabulous Noah for my card. Used my favourite My Mind's Eye - 6x6 Paper Pad - Stella & Rose - Mabel and heat embossed the sentiment.

 I went for sunkissed dreads with a beachy look and these are the copics I used!!

I've included quite a few challenges on this card too...

FFF ~ lets hear it for the boys!
Papertake Weekly ~ truly Dimensional
Cps 213 ~ fabby Sketch

Thanks for stopping by hope it inspires!
BiG HuGs Kim :)

Monday, April 11

Show some Distressing!

Good Morning!!! It's Monday already? so, let me bring you on the theme at...


Stamp and show some distressing!

Inspired by Wendy's fabulous stamp set I just had to create an art binder using creative-covers collaged with old book pages applied with Claudine Helmuth's Matte Medium, covered with gesso. Stamped book cover stamp with distress ink and distress embossing. I have secured ring binder inside, then stamped and adhered some sticky back canvas to the spine.


You may have noticed the Tattered florals flower is from my little tutorial the other day. (and for those who asked I use a bigshot for my die cutting...) I then adorned flower with leaf art part painted with crackle paint


I then added letters using shrink plastic, paint dabber on the back and added glossy accents on top.
I do intend to add pages with dividers and inspiring quotes. It's been such a wonderful weekend and today we're off to the seaside!


Photobucket

Hope it inspires and why not pop round to the rest of the team!!!

THE director ~ Linda Elbourne
Candy Colwell ~ Dan ~
 Kim Costello <~ You're already here

Thanks for stopping by, have a wonderfully sunny creative day!
BiG HuGs Kim :)

Friday, April 8

Introducing...The Peekers by Elisabeth Bell for SCACD Stamps!

Elisabeth Bell for SCACD Stamps - The Peekers - available at www.quixoticpaperie.co.uk

The Quixotic Paperie design team have once again joined forces with the SCACD design team for this blog hop to celebrate the release of THE PEEKERS by Elisabeth Bell. We think you'll agree, these are some of the most adorable images by Elisabeth Bell, truly capturing the mischief and innocence of childhood.

There are FIVE adorable Peekers in this release, and they are available either individually or as a full set at a special discounted price!
If you're in the UK/Europe you can buy the stamps NOW at Quixotic Paperie.

On to the hop!

If you have hopped on over here from Elaine then you are on the right track, if not then the first blog on the hop you need to go to is Kim G's Blog - Crafts By Kim.

For my make I have used Daydreaming Peeker


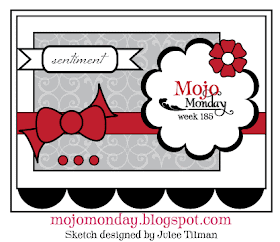
My card is inspired by the wonderful sketch Mojo185


The next stop on your journey is the talented Mary Johnson.

Enjoy the hop and be inspired BiG  HuGs Kim :)

Thursday, April 7

Layered Flower Tutorial


I've had lots of admiring enquiries about the flower in the above piece so... thought it was about time for a tutorial and share how I made it.... I hope you enjoy! (there's lots of pictures too)
I used some grate paper as it's double sided patterned paper, or you can use plain and ink it up yourself.
 Then cut eight of the long petal flowers from the tattered florals die.
I use a thick piece of foam, I used to use the back of a mouse mat but found it compresses so much over time!
I use the end of this tool, really should get some professional tools but this one works... so any rounded pen top should do the job... LOL!
Now it's time to create texture, I run the end round the edges of the petal, notice the creases?
I then push along the centre which allows the paper to curl, the harder you press the deeper the curve.
Now simply push the petals together to form a ball
You can even push on the top to really help it to form a ball, now continue with the rest of the flowers,
 you may notice that they don't need to be shaped so tightly, as you reach the outer petals.
For the two bottom layers turn them over and burnish the centres.
Now it's time to build, starting with the bottom petal apply hot glue (or what ever your favourite is) to the centre
Lay the next petal in place adjusting it off centre slightly.
Then glue the next shaped petal layer
Simply glue and push the centres of each layer till you have all eight secure.
It's alright to open the petals up... as you can fiddle with the shape when built!
Complete, you can add a decorative centre with button or gem and have the petals looser.
Or... tighten the ball shape again for each layer!
Can't beat a little bit of glitz... LOL!
Hope you have fun and I would love to see your makes if you do try.

Have a wonderfully creative Day, BiG HuGs Kim :)


Wednesday, April 6

Lots of Challenges!!!

Hello, good morning!


Elaine has the Artistic Outpost - Bluebird stamp set in stock at Quixotic and I had to have a them. I've used Distress Stain - Antique Linen and distress ink on the doily, then stamped the bird image using Archival - Coffee.


The gorgeous papers are Graphic 45 - Once Upon A Springtime and I've finished the bow with a Pearl Spray.


I have tried to include a few challenges in my card, tee hee...


and I have the optional extra of the stamp set and papers as my newbie stuff :)


The silver is the pearl sprig


Card Patterns ~ Sketch 109


and while I was in the entering challenges mood I thought I would snap a quick picture of my extremely messy desk to play over at Julia's place... aka WOYWW. This is after I made my card and there's lots of bits left from other makes too :)


So I hope it inspires, have a wonderful Wednesday
Hoping to have a little flower tutorial for those who enquired, see you tomorrow!
BiG HuGs Kim :)

Monday, April 4

Simon Says Stamp and Show.... Anything, but a card!!!

Good Morning!!! I hope you had a fabulous weekend we had a wonderful time celebrating Maoleidigh's 3rd birthday and a fun mother's day too ♥

so, let me bring you on the theme...
 at


Stamp and show anything but a card! 

I have Constructed a notebook portfolio covered with the new Tim Holtz crowded attic Paper which makes a fabulous background for the dress form. I cut out using grungeboard, grungepaper for the skirt, coloured with distress ink and a little black paint dabber. 


The body is covered with Claudine Hellmuth's Sticky-Back Canvas. Inked with distress ink and adorned with a little prima lace, seam binding, acroutrement, and pins.

Added angel wings from glitter paper and canvas, embossed and inked. Then added a few layered flowers cut with vintage shabby paper using of course the Tim Holtz Tattered Florals die.


The inside I have added these cute envelopes for little notes etc and recovered a notebook using some of the fabulous crowded attic Paper. I secured a ribbon to hold a pen.


The button fastening is made from grungeboard and the holes are reinforced with eyelets... love that look, inked and then hand sewn in place!

Photobucket

Hope it inspires and why not pop round to be WOW'd by the rest of the team!!!

THE director ~ Linda Elbourne
Candy Colwell ~ Dan ~
 Kim Costello <~ You're already here

Thanks for stopping by, have a super wonderful creative day!
BiG HuGs Kim :)